Color and brush
Color and brush are important parts of Pixly, because the way you set them, will affect most tools you use throughout your session.
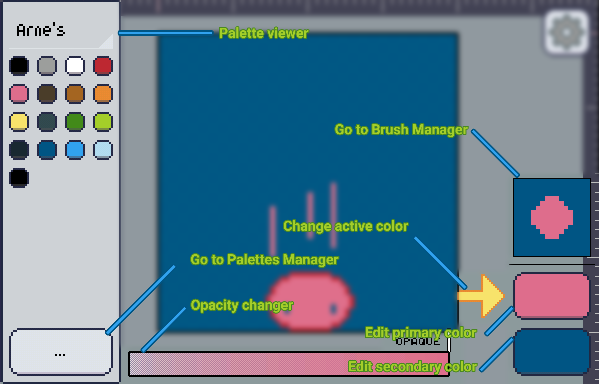
Your current primary and secondary colors will always (with some exceptions) be visible on the bottom-right corner of the screen (upper-right if Pixly is in portrait-mode), if you touch it, an expanded version will be shown.
Lot's of stuff!
Palette viewer
On the left side, we have the palette viewer, where you can pick colors and access the palette manager, where you can load, export, delete, organize... do stuff with your palettes.
Opacity
On the bottom, there is the opacity changer, where you can control the opacity of your brush and tools. It is very simple: The more you drag the handle to the left, the more transparent your color will be (it will mix more), the more you drag the handle to the right, the more opaque it will be (will mix less, becoming a solid color).
Selected color
The giant yellow/orange arrow tells you which color you currently have selected, the primary or the secondary. Understanding how the primary and secondary colors affect your workflow is important! E.g., a secondary color set wrong can make you unable to see previous frames on onion skin or make your eraser go all wrong.
Brush and colors
Stacked on the right side of the screen, there's a picture of your brush, which you can tap to access the brush settings, which is also where lies the patterns. And right below the brush, you can find how your primary color looks, and how your secondary color looks. Tapping either will allow you to enter the color selector, to edit that color you tapped.
If you tap anywhere else on the screen, you'll go back to the artboard.